Europe / EUR >
How to paint Victorian brackets — primer, colour and technique
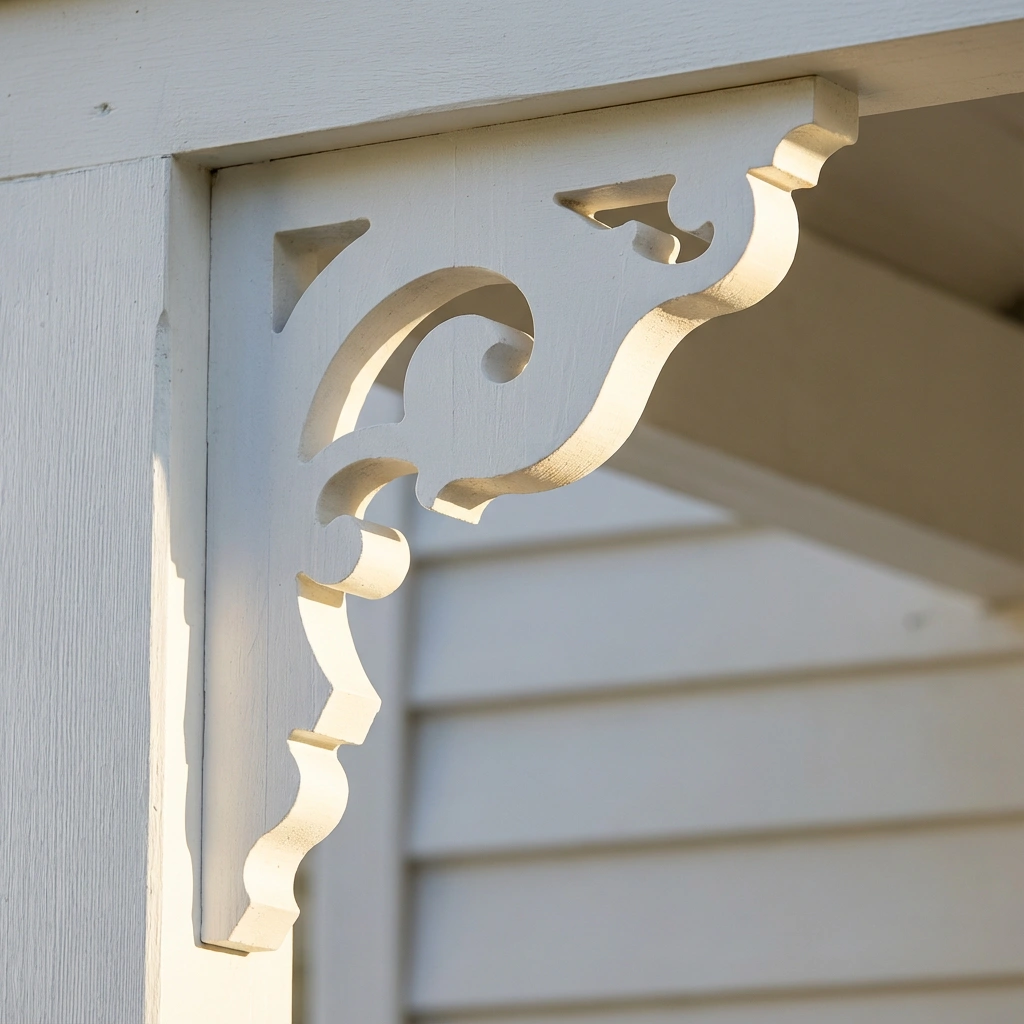
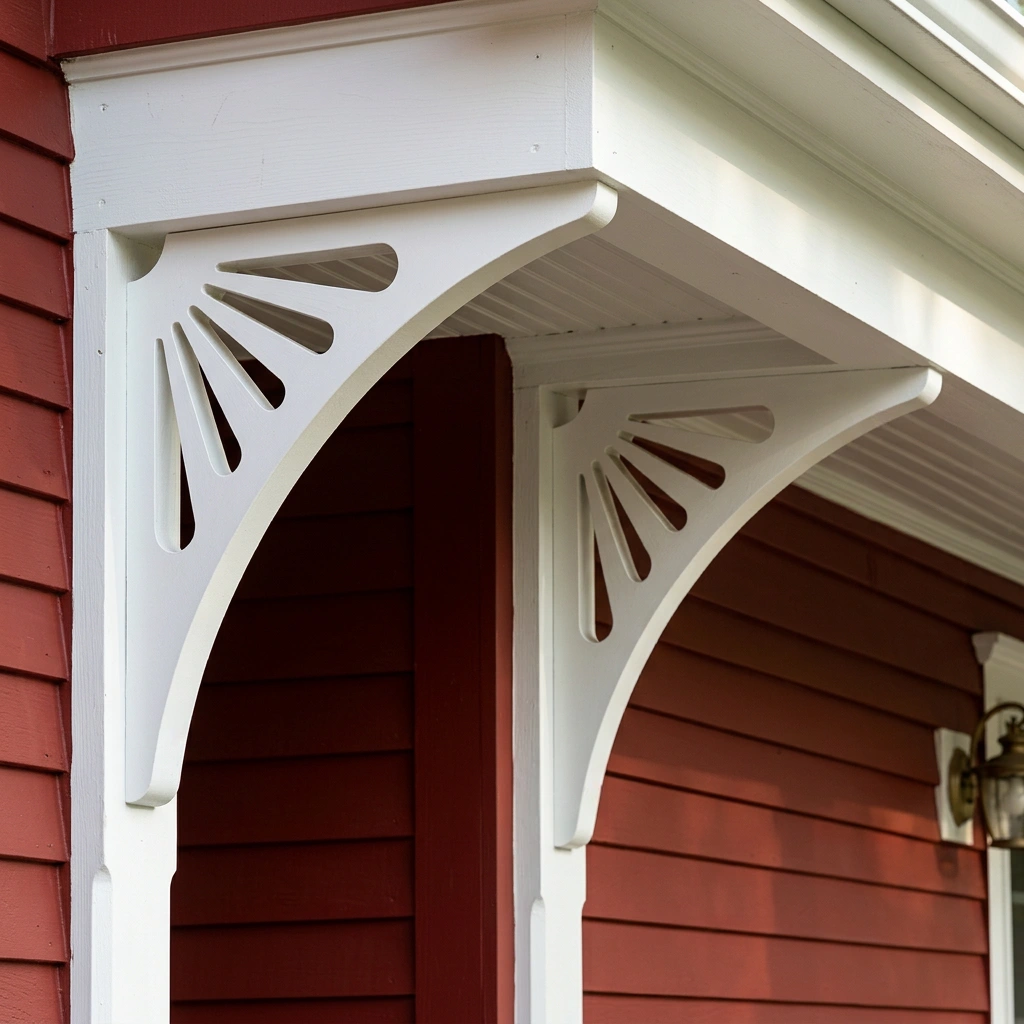
An unfinished Victorian bracket is a blank canvas — the final result is entirely up to you. But the right technique makes all the difference between a finish that peels after one season and one that holds for ten years. In this guide, we cover everything you need to know: which primer to choose, how to handle the intricate details of an ornament, and how to pick a colour that suits your home.
What you’ll need

Gather your materials before you start — it goes much faster when everything is within reach:
⦁ Sandpaper — 120-grit and 180-grit
⦁ Exterior wood primer (see more below)
⦁ Exterior topcoat paint with UV protection
⦁ Narrow detail brush for ornament edges (15–20 mm)
⦁ Wide brush or small roller for larger surfaces
⦁ Masking paper or plastic sheeting if painting after mounting
⦁ A clean cloth and optionally acetone to wipe down the surface before painting
Paint before or after mounting?

The simple answer: always paint before mounting. That way you can reach every surface — including the back and the end grain — which become impossible to access once the bracket is fixed to the wall. It’s precisely those hidden surfaces that absorb moisture and are most vulnerable to rot.
If you’ve already mounted the bracket unpainted, it’s still possible to do a good job — but take extra care to work a narrow brush into the edges, and seal the back with a silicone bead.
Tip: Apply an extra coat of primer to the end grain (the cut edges). End grain has open fibres that absorb moisture like a sponge — it’s the most common reason wooden trim starts to rot.
Choosing the right primer
The primer is the most important layer — it determines how well the topcoat adheres and how long the finish lasts. There are three types to choose from:
⦁ Alkyd primer (oil-based): The traditional choice for exterior wood. It penetrates deep into the wood fibres, seals knot pockets in pine, and creates an extremely durable base. The downside is long drying time (12–24 hours) and the need for white spirit to clean brushes. Best choice for Victorian brackets that will be outdoors for many years.
⦁ Water-based primer: Modern water-based primers have improved significantly and are easier to work with — clean up with water, shorter drying time (2–4 hours). Works well if you choose a quality product.
⦁ Shellac primer (spirit-based): Used specifically to seal knot holes and resin pockets in pine, which can otherwise bleed through topcoat and cause yellow staining. Apply a thin coat over any knots or resin pockets before priming the whole surface.
Step by step — how to paint Victorian brackets
Start with 120-grit sandpaper, working along the wood grain. Follow up with 180-grit for a smoother surface. Blow or wipe away all sanding dust with a dry cloth. Don’t skip this step — dust trapped under paint creates an uneven surface and reduces adhesion.
Seal knot holes (if needed): Does the bracket have visible knot holes or resin pockets? Apply a thin coat of shellac primer to those spots and allow to dry completely (around 30 minutes) before moving on.
Prime all surfaces: Apply an even coat of primer to every surface — front, back, sides, and end grain. Use a narrow brush to work into the ornament’s details and curves. Allow to dry according to the manufacturer’s instructions.
Light sanding: Once the primer is dry, lightly sand with 220-grit. This smooths out any brush marks and gives the topcoat a perfect surface to bond to. Wipe away the dust again.
Apply topcoat, coat 1: Brush on the topcoat in thin, even layers. Start with the details and curves, then move on to the flat surfaces. Thick coats dry unevenly and are more likely to peel — thin and even is the key.
Wait and apply coat 2: Allow the first coat to dry fully — at least as long as the manufacturer recommends (often 4–24 hours depending on paint and temperature). Apply a second coat in the same way. Two thin coats are always better than one thick one.
Check and mount: Inspect the bracket in daylight and touch up any thin or missed areas with a third coat if needed. Allow to cure fully — at least 48 hours at room temperature — before mounting.
Colour choice — what suits your home?

Victorian brackets are traditionally painted white, and for good reason — white shows up clearly against any house colour and highlights the detail in the ornament. But it’s far from the only option.
⦁ White or off-white: The classic choice. Works with any house style and gives a timeless period feel. Off-white (such as NCS S 0502-Y) is softer and ages more gracefully than pure white.
⦁ Match the house colour: If you want a more cohesive and understated look, paint the brackets in the same tone as the facade. Creates a modern, architectural impression.
⦁ Contrast colour: A bolder choice — paint the brackets in an accent colour that contrasts with the facade. Dark green against yellow, terracotta against grey, or navy against white are all timeless combinations.
⦁ Colour tips by house type: Red Falun-red cottage → white or off-white. Yellow timber facade → white or black. Grey modern facade → dark green, anthracite, or white. Period-style house → white with gold or terracotta accents.
No. Interior paint lacks the UV protection and flexibility needed to handle outdoor temperature changes. It will crack and peel quickly. Always use a paint labelled for exterior use.
The minimum is one primer coat and two topcoats. Three topcoats on exposed areas such as end grain and the bottom edge gives the best protection and longest durability.
Yes — and for brackets with a lot of fine detail, spray can actually give a more even result. Use a can of primer and a quality spray topcoat. Cover the surrounding area carefully and keep the can around 25 cm from the surface.
With correct priming and a good topcoat, repainting every 5–8 years is sufficient in a typical Northern European climate. South-facing surfaces with heavy sun exposure may need repainting a little more frequently.
Not if the existing paint is firmly adhered and not peeling. Lightly sand with 180-grit to give the new coat something to grip, clean the surface, and paint directly over it. If the existing paint is peeling, you’ll need to scrape and sand back to bare wood first.