Europe / EUR >
How to replace furniture legs on an IKEA piece
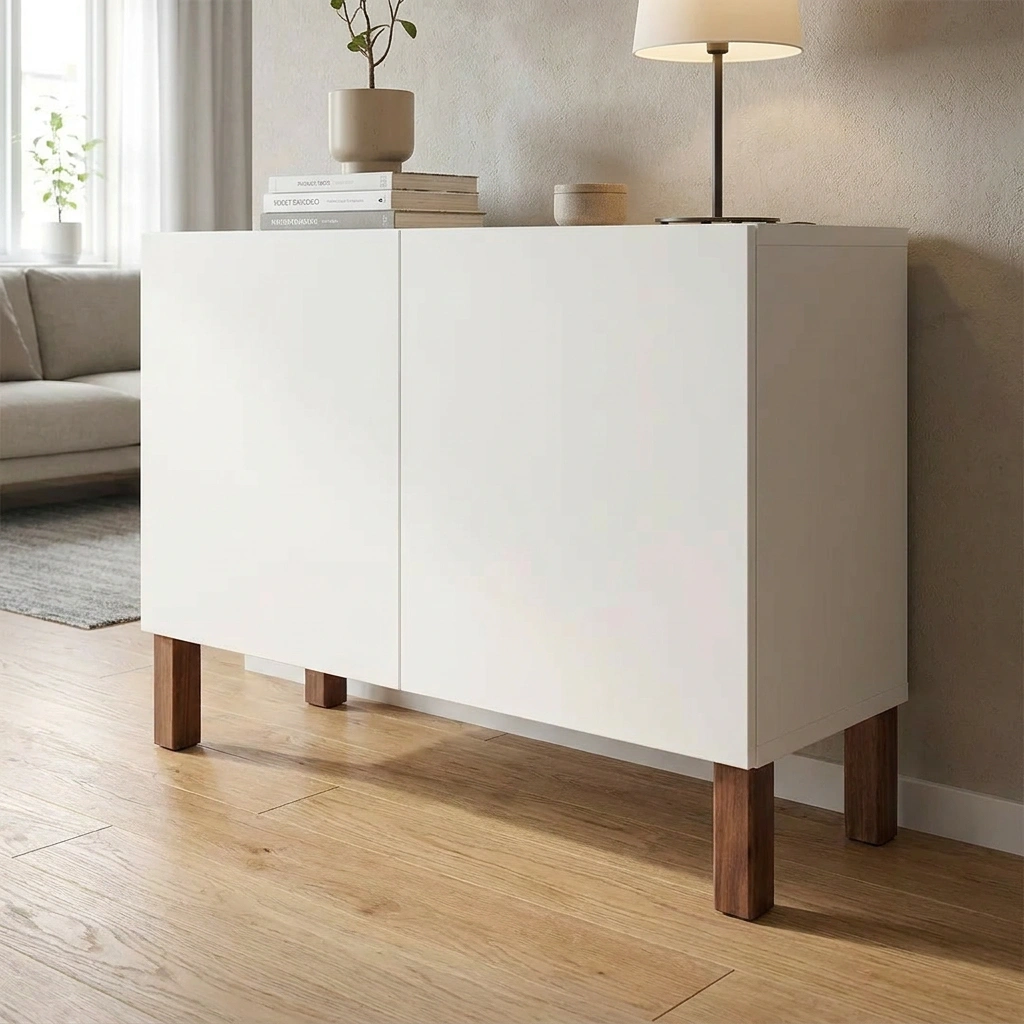
Replacing furniture legs is one of the easiest and most impactful ways to give an old IKEA piece a completely new look. With the right legs, a worn-out Kallax unit can be transformed into a designer piece — and it takes just 15 minutes. In this guide, we cover everything you need to know: which legs fit, what tools you need, and how to do it step by step.
1. Why replace furniture legs?
IKEA furniture is functional and affordable — but it often comes with plastic feet or thin legs that don’t quite match a more considered interior. Common reasons to upgrade:
⦁ You want to raise the piece higher — easier to clean underneath, more comfortable height
⦁ You want a more Scandinavian or industrial look
⦁ The original legs are broken or worn
⦁ You’ve found a unique piece at a secondhand shop and want to give it new life
2. Will new legs fit my IKEA furniture?
It depends on how your IKEA piece attaches its legs. There are three common systems:
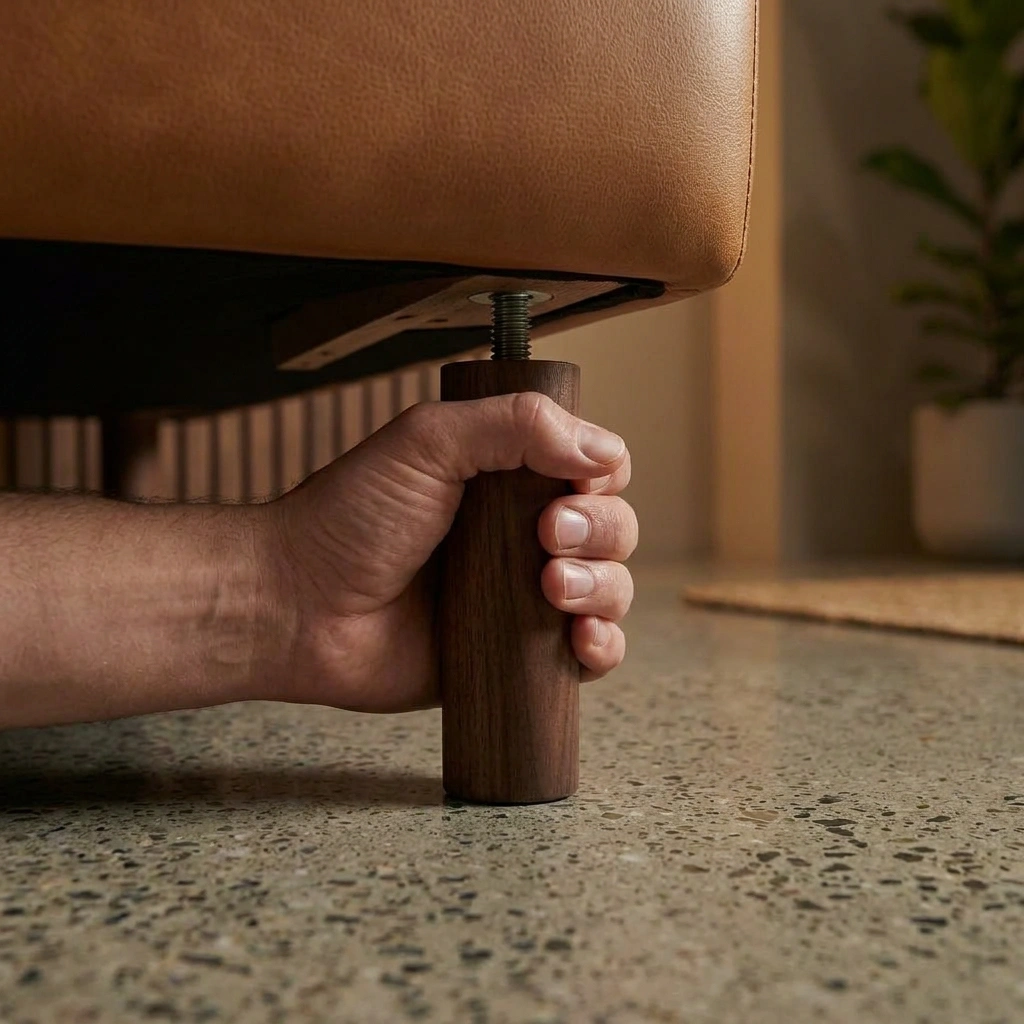
Screw directly into the frame (M8 thread)
Many IKEA sofas and tables have a recessed threaded insert (M8) built into the frame. If your new leg has an M8 thread, it screws straight in — no adapter needed. Common on: Ektorp, Kivik, Klippan, Lack.
Leg bracket / angle plate
Some models use a leg bracket — a small metal plate mounted to the underside of the furniture that the leg clips or screws into. Here you’ll need either a compatible bracket or a leg that matches the system. Common on: Billy, Kallax, Hemnes.
Base frame / underframe
Some cabinets and sideboards sit on a separate base frame. Here you can either replace the entire frame with a new one, or mount your own base directly under the cabinet body.
Not sure which system your IKEA piece uses? Look underneath for a small round hole (M8 thread) or a square metal plate (leg bracket). You can also search your model name on the IKEA website.
3. Choosing the right legs — height, diameter and wood
Once you know which system your furniture uses, it’s time to choose legs. Keep these in mind:
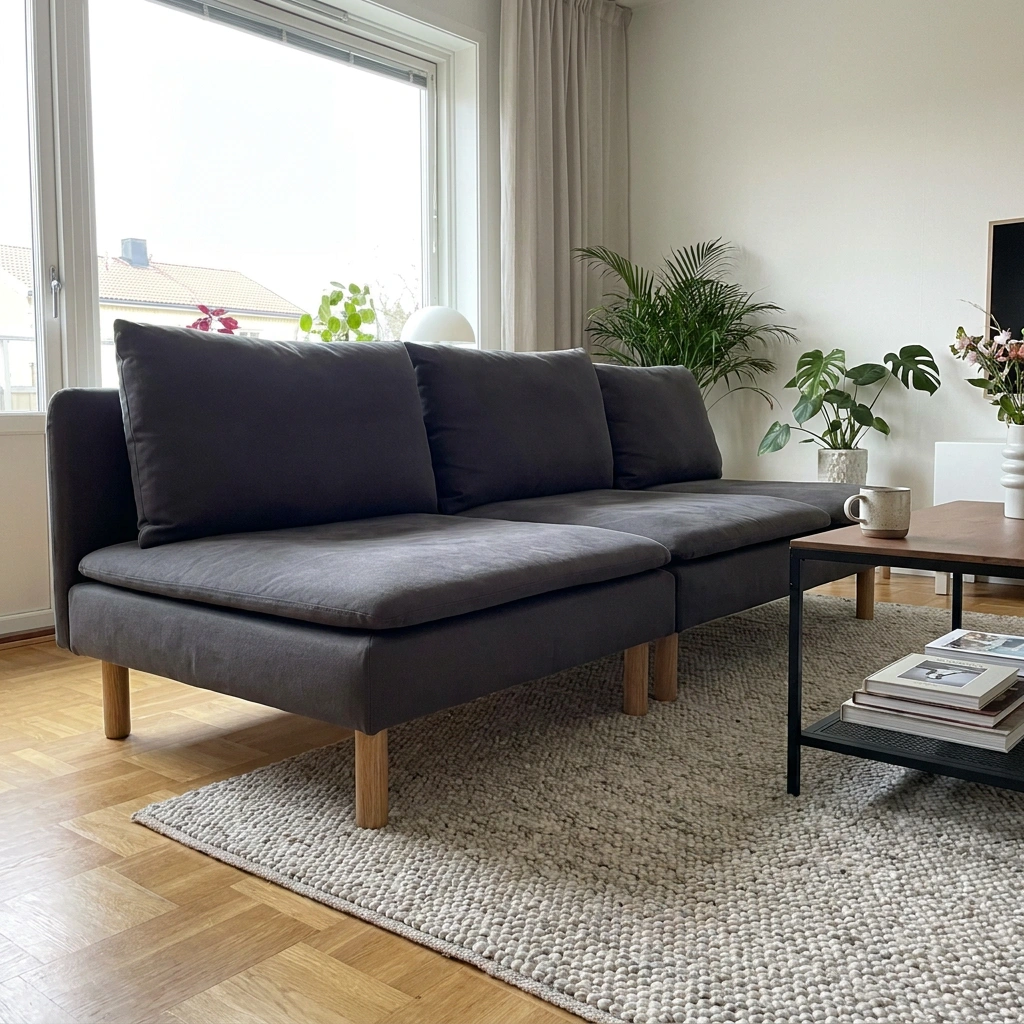
⦁ Height: Standard height for sofa legs is 10–20 cm. Bench and table legs are typically 40–72 cm. Keep in mind that legs that are too tall can make the piece feel unstable.
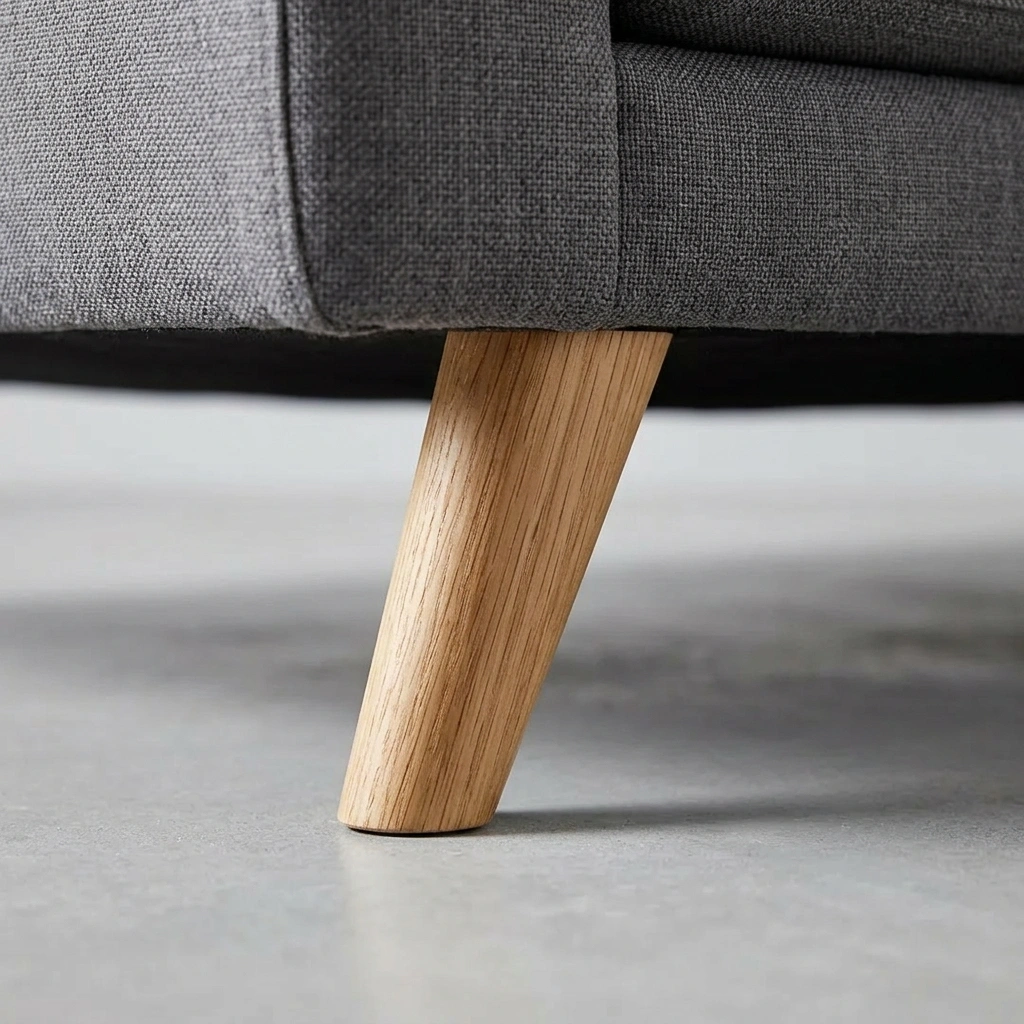
⦁ Diameter: Choose a diameter that looks proportional to the size of the furniture. Thin tapered legs give a light Scandinavian feel; thick straight legs give a more industrial or rustic look.
⦁ Wood type: Oak is durable and timeless — suits most styles. Beech is slightly lighter with a tighter grain. Pine is a budget-friendly option with a great natural surface.
⦁ Finish: Choose unfinished if you want to oil or paint yourself. Pre-finished is convenient and ready to mount straight away.
4. Step by step: how to replace furniture legs
You’ll need: new furniture legs, possibly an adjustable spanner or hex key, and a few minutes per leg.
Turn the furniture upside down: Place a soft surface (blanket or rug) on the floor to protect the piece. Turn the furniture upside down so the underside faces up.
Remove the old legs: Unscrew the existing legs anti-clockwise. For bracket systems, lift the leg out of the bracket and remove the bracket itself with a screwdriver.
Check the holes: Make sure the threads are intact and the holes are clean. Remove any wood shavings with a small brush.
Install the new legs: Screw the new legs in clockwise by hand until they feel firm. Don’t over-tighten — you can crack the wood. A quarter turn with a spanner after hand-tightening is enough.
Turn upright and check: Flip the furniture back and test that it stands stable. If it wobbles, adjust the legs until all four make even contact with the floor.
Yes! Billy uses leg brackets mounted to the underside of the frame. You’ll need either a compatible bracket or a leg with the right mounting plate. A popular choice is straight or tapered oak legs for a more natural, premium look.
M8 is a standardised metric thread with an 8 mm diameter. It’s the most common leg fitting system in Sweden and is used in most IKEA sofas and armchairs.
Absolutely. Unfinished solid wood legs in oak or beech absorb oil or lacquer beautifully. Clean the surface, lightly sand with 180-grit sandpaper along the grain, and apply your preferred finish.